Wednesday, April 25, 2007
Contest #2
OK the plan was to leave Contest #1 open for a few more days but I see that my readers are a little too knowledgeable about Bloomington locations. Congratulations to Bill, Krystal & Dave for guessing right. The photo from Contest #1 was taken at the Normandale Community College's Japanese Garden.
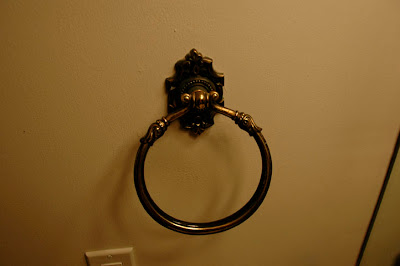
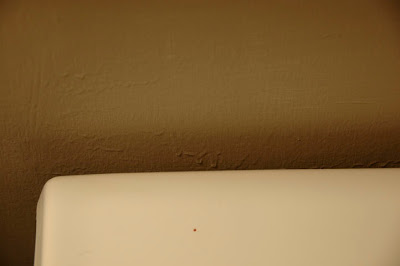
This photo was also taken in the Twin Cities Metro area. Can you tell me where I was?
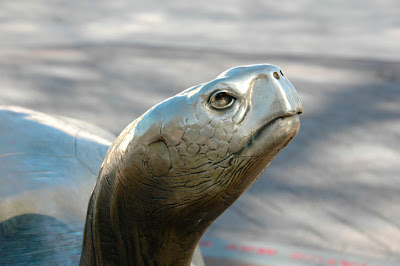
This photo was also taken in the Twin Cities Metro area. Can you tell me where I was?

Tuesday, April 24, 2007
Contest #1
This is the first post of what I hope can become a recurring theme on my blog. After having Quiz Time during my last post I came up with an idea. A photo contest if you will.
Now this will not be a send me your pictures and I will pick the best ones, type of contest. In this contest I will post a picture (maybe more then one sometimes) and we will see who can identify the subject. Please leave your guess or guesses in the comments section and after a few days, maybe a week I will announce who/if anyone got the correct answer. I may offer occasional prizes but they will most likely not be worth winning (I still have the 2 paper boxes available). The photos will usually be taken in the Twin Cities Metro Area or will be of a subject that is not area specific. I will eventually run out of usable photos for the contest so if you would like you can e-mail me a photo that you have taken or an idea for a photo location/subject that I could take a photo of.
So without further ado I present Contest #1.


Monday, April 23, 2007
Quiz Time
Saturday, April 21, 2007
Vacation Project #2
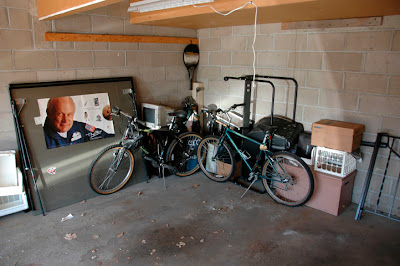
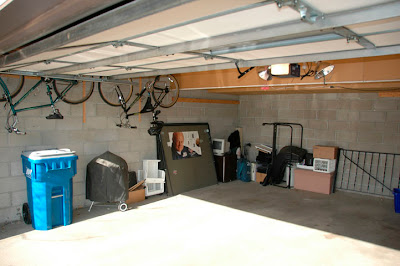
My garage is designed to hold 2 cars but I was using about 1 space worth to store junk in a rather unorganized fashion. I decided that my garage needed to be swept out and organized a little. One snowy night this winter after getting home from work after 11:00pm I was shovelling my driveway and I can't explain why but I started organizing my garage (mind you it was about 10 degrees outside). I managed to get the garage cleared up enough to fit 2 cars in comfortably. However I decided any further cleaning and organizing would require warmer temps.
About a month ago it got nice and I went to Target and bought some shelves. The garage also needed some additional lights. The only lights in the garage were the light in the garage door opener, a single socket bulb and a fluorescent light in one corner. The fluorescent light worked fine however in each of the three winters since moving into the house I had at least 1 bulb fall out and shatter on the floor (once on my car). I got a couple large clamp lights and another fluorescent light from Home Depot. I was not sure how I was going to hang the clamp lights but they were on sale. Of course the day after I go and get all the supplies to clean the garage up Winter rears its ugly head again.
After I finished painting the bathroom earlier this week I had a few days left on my vacation. It was finally nice out again. Now was the time to finish organizing and cleaning the garage.
The first thing that needed some attention was the box corner. Most of the boxes were left over from when I moved in. I had been saving the boxes for moving again but it seems that is now a few years off, time to toss some of them. I also decided that this is the corner I wanted the new shelves in. I had 2 different sizes of shelves that went together very easily, they should hold quite a bit.
 When my Sister moved to California my Dad took most of her stuff for storage until she comes back to Minnesota (come on Amy you know you will sooner or later!). Other then her bed (which makes an excellent guest bed) the only thing I am sotring is her bike. With only 1 car in the garage the bikes being on the ground was not an issue, but now that I can fit 2 cars in the bikes get in the way. I have not been riding my bike much, but that might change with a little competition going on at work (a story for another post soon). I got some simple bike hooks from Erik's Bike Shop. The only spot to hang the bikes and keep them out of the way on a daily basis was next to the common wall along side the garage door track. This should not be a problem since I will hardly ever have to take down Amy's bike. The hooks get the bikes high enough off the ground that the garbage and recycling cans still fit under them easily.
About a month ago it got nice and I went to Target and bought some shelves. The garage also needed some additional lights. The only lights in the garage were the light in the garage door opener, a single socket bulb and a fluorescent light in one corner. The fluorescent light worked fine however in each of the three winters since moving into the house I had at least 1 bulb fall out and shatter on the floor (once on my car). I got a couple large clamp lights and another fluorescent light from Home Depot. I was not sure how I was going to hang the clamp lights but they were on sale. Of course the day after I go and get all the supplies to clean the garage up Winter rears its ugly head again.
After I finished painting the bathroom earlier this week I had a few days left on my vacation. It was finally nice out again. Now was the time to finish organizing and cleaning the garage.
The first thing that needed some attention was the box corner. Most of the boxes were left over from when I moved in. I had been saving the boxes for moving again but it seems that is now a few years off, time to toss some of them. I also decided that this is the corner I wanted the new shelves in. I had 2 different sizes of shelves that went together very easily, they should hold quite a bit.
Before
 When my Sister moved to California my Dad took most of her stuff for storage until she comes back to Minnesota (come on Amy you know you will sooner or later!). Other then her bed (which makes an excellent guest bed) the only thing I am sotring is her bike. With only 1 car in the garage the bikes being on the ground was not an issue, but now that I can fit 2 cars in the bikes get in the way. I have not been riding my bike much, but that might change with a little competition going on at work (a story for another post soon). I got some simple bike hooks from Erik's Bike Shop. The only spot to hang the bikes and keep them out of the way on a daily basis was next to the common wall along side the garage door track. This should not be a problem since I will hardly ever have to take down Amy's bike. The hooks get the bikes high enough off the ground that the garbage and recycling cans still fit under them easily.
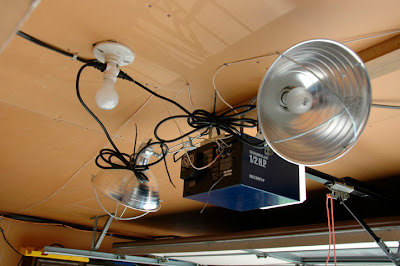
As I mentioned the lighting was not bad but could definitley have been better, so better is what I did. I added a new fluorescent light that is plugged into an outlet instead of hard wired. That was hung towards the back of the garge behind a beam. I clamped the 2 clamp lights to the support bracket for the garage door and plugged them into an adapter on the original light socket. After I got all of the lights up I shut the garage door to see how bright it was, I was pleasently suprised.
The new clamp lights and the original socket light
The only thing that still bugs me a little is the firewood that the previous owner left. Before I bought the house he asked me if I wanted him to leave it since his new house did not have a wood burning fireplace. At the time it sounded like a good idea. It has been 3 years and I have not had a single fire in the fireplace nor do I plan on having one anytime soon. If you or anyone you know wants what seems to be good firewood let me know, it would clear up a good chunk of garage space.
Tuesday, April 17, 2007
Vacation Project
I have lived in my townhouse for almost three years now. On move in day my Mom and Dad painted the master bedroom and the lower level while a couple friends and I moved everything in. You see, I have never liked painting very much. I am not sure why but I must have some suppressed bad memory from childhood. Other then those two rooms being painted I have not done a lot of work since I moved in. Last fall I had the vinyl flooring redone in the upstairs bathroom, front entry and lower level entry/bathroom area (that just might be another entry for a later time).
I am in the middle of having ten days off from work and have been talking about painting my upstairs bathroom for about a month now. A previous owner had taken down some wallpaper in the bathroom and had not done a very good job of getting the wallpaper glue off the wall, and it was starting to bother me. Now despite having some hatred towards painting I thought: "how bad can I really be at it, it can't be that hard". So I decided that I was going to attempt to paint the room by myself. I decided I had to do some sort of faux finish to cover up the remnants of the glue on one wall (I thought about sanding the wall but that sounded like even less fun). I had used Behr Sandwash Texture Paint before at my Mom's house when we redid the basement. The look of the paint is kinda cool, it is basically paint mixed with very small pieces of sand to give it texture. On Friday, I went with my Dad to Home Depot to decide on a color and settled on a light grey color (Fine Granite) that matched the flooring very well. I also bought a new towel hook to replace the original circa 1975. I was actually getting excited to do this project, maybe my fear of painting has passed!
First a couple of before photos.

On Saturday I was set to begin. I taped off everything in the room except the ceiling (damn popcorn). The Sandwash paint is a four step process. The first step is called the "foundation" coat and seems to pretty much be regular paint tinted to a specific color to match the final two coats. I was actually pleased that the first coat was normal paint. "Should be pretty simple, I mean everybody can paint right" I thought. Well I can tell you for a fact that NO not everyone can paint. The first wall that I attempted went so poorly that I actually stopped painting and called a friend for backup. She agreed to come over on Sunday to help. I decided to power through and finish the foundation coat hoping we could make it look OK with the next couple coats. Here are a couple pictures taken after the foundation coat, I will draw your attention to the horrible dripping in the second photo (more on that in a minute).

 It is now Sunday and thankfully backup has arrived! I showed my friend the room and was immediately scolded for the dripping and was deservedly laughed at for a while. After we sanded the worst of the drips we (read: she) started applying the second coat. The second and third coats are both the actual Sandwash paint. It needs to be applied with a roller to get the desired look (I should mention here that rolling is the part of painting I am apparently not capable of, the foundation coat was entirely brushed on!). This coat was going on very well, it looked great and was covering up my hideous coat. I was a little nervous when we realized that I would need to paint above the bathtub due to some ceiling height issues. I think and was told that I did OK, I did not ruin the wall and you almost could not tell the difference. We finished the second coat together and called it a night, it had taken us nearly four hours to paint a small bathroom. Here is a picture after the second coat, it is a little hard to tell but the paint is a little uneven, which the instructions said would happen.
 Now that Monday has rolled around I am on my own again for the final coat of paint. I must admit that I was scared to death. I woke up in the morning and then procrastinated for about six hours before going back to Home Depot to get a new paintbrush for the final coat. I found a large spot next the shower that we had missed on Sunday. I put one coat on that area and then started step three of the process. It actually went very well! I am very happy with the results! Here is a picture taken after the second Sandwash coat had dried.
 This is a close up of the paint color itself after three of the four steps, I can not find a better picture of it online anywhere.
 The last step to the process is a clear coat polyurethane that can be put on after seven days. It is supposed to seal the paint, however the instructions also say it will darken the color a little so I may skip that step. Once I decide about that I will be able to take the tape down and put up the new towel hook that matches the light fixture.
To be honest I had an entirely different idea for this entry after Saturday's experience. The entry was going to be called "Jobs I Won't Do!" However with the help of a friend I realized that while I am not a great painter I can do it. I can not thank her enough for both saving me and teaching me a lesson. I would have been lost without the help, thanks again! This does not mean that I will painting anything else anytime soon though.
I still have three days off and a small project that I would like to do in my garage, if the weather cooperates hopefully I can get that done too.
I am in the middle of having ten days off from work and have been talking about painting my upstairs bathroom for about a month now. A previous owner had taken down some wallpaper in the bathroom and had not done a very good job of getting the wallpaper glue off the wall, and it was starting to bother me. Now despite having some hatred towards painting I thought: "how bad can I really be at it, it can't be that hard". So I decided that I was going to attempt to paint the room by myself. I decided I had to do some sort of faux finish to cover up the remnants of the glue on one wall (I thought about sanding the wall but that sounded like even less fun). I had used Behr Sandwash Texture Paint before at my Mom's house when we redid the basement. The look of the paint is kinda cool, it is basically paint mixed with very small pieces of sand to give it texture. On Friday, I went with my Dad to Home Depot to decide on a color and settled on a light grey color (Fine Granite) that matched the flooring very well. I also bought a new towel hook to replace the original circa 1975. I was actually getting excited to do this project, maybe my fear of painting has passed!
First a couple of before photos.


On Saturday I was set to begin. I taped off everything in the room except the ceiling (damn popcorn). The Sandwash paint is a four step process. The first step is called the "foundation" coat and seems to pretty much be regular paint tinted to a specific color to match the final two coats. I was actually pleased that the first coat was normal paint. "Should be pretty simple, I mean everybody can paint right" I thought. Well I can tell you for a fact that NO not everyone can paint. The first wall that I attempted went so poorly that I actually stopped painting and called a friend for backup. She agreed to come over on Sunday to help. I decided to power through and finish the foundation coat hoping we could make it look OK with the next couple coats. Here are a couple pictures taken after the foundation coat, I will draw your attention to the horrible dripping in the second photo (more on that in a minute).

 It is now Sunday and thankfully backup has arrived! I showed my friend the room and was immediately scolded for the dripping and was deservedly laughed at for a while. After we sanded the worst of the drips we (read: she) started applying the second coat. The second and third coats are both the actual Sandwash paint. It needs to be applied with a roller to get the desired look (I should mention here that rolling is the part of painting I am apparently not capable of, the foundation coat was entirely brushed on!). This coat was going on very well, it looked great and was covering up my hideous coat. I was a little nervous when we realized that I would need to paint above the bathtub due to some ceiling height issues. I think and was told that I did OK, I did not ruin the wall and you almost could not tell the difference. We finished the second coat together and called it a night, it had taken us nearly four hours to paint a small bathroom. Here is a picture after the second coat, it is a little hard to tell but the paint is a little uneven, which the instructions said would happen.
 Now that Monday has rolled around I am on my own again for the final coat of paint. I must admit that I was scared to death. I woke up in the morning and then procrastinated for about six hours before going back to Home Depot to get a new paintbrush for the final coat. I found a large spot next the shower that we had missed on Sunday. I put one coat on that area and then started step three of the process. It actually went very well! I am very happy with the results! Here is a picture taken after the second Sandwash coat had dried.
 This is a close up of the paint color itself after three of the four steps, I can not find a better picture of it online anywhere.
 The last step to the process is a clear coat polyurethane that can be put on after seven days. It is supposed to seal the paint, however the instructions also say it will darken the color a little so I may skip that step. Once I decide about that I will be able to take the tape down and put up the new towel hook that matches the light fixture.
To be honest I had an entirely different idea for this entry after Saturday's experience. The entry was going to be called "Jobs I Won't Do!" However with the help of a friend I realized that while I am not a great painter I can do it. I can not thank her enough for both saving me and teaching me a lesson. I would have been lost without the help, thanks again! This does not mean that I will painting anything else anytime soon though.
I still have three days off and a small project that I would like to do in my garage, if the weather cooperates hopefully I can get that done too.
Subscribe to:
Posts (Atom)


